embroidery etiketine sahip kayıtlar gösteriliyor. Tüm kayıtları göster

22 Temmuz 2011 Cuma

French Knot

French Knot

To finish off your pretty flowers you need a center a French Knot. This also is very handy for tying knots at the end of your thread.
Step 1: Come up and wrap thread around needle twice. You want to keep your needle fairly tight to the fabric and your thread tight on the needle.
Sep 2: Holding thread snug, go down and pull thread through.
Finished!
 It may take a little practice to get them looking right. Remember to hold your thread snuggly.

21 Temmuz 2011 Perşembe

Lazy Daisy Stitch

Lazy Daisy Stitch

Today, a how-to on the Lazy Daisy Stitch.

This stitch makes the most beautiful flowers and leaves!
 Step 1: Come up at Point A. (Point A being the narrow end of your petal.)
Step 2: Go down at Point A and come up at Point B. (Point B being the rounded end)
 Still Step 2: wrap the thread about the needle.
Step 3: Pull the needle through and go down at Point B to hold the petal in place.
 Done!

Now here is an embroidery design for you to practice on! Tomorrow I will post a how-to on French Knots so you can fill in the middle of the flowers.

30 Mart 2011 Çarşamba

How to do the Outline Stitch

How to do the Outline Stitch

This is a 1940's illustration on how to do the outline stitch. Very simple really. (I just realized that I have been holding my thread down, not up, as in the picture! My stitches overlap the other way. It is still pretty, either way!)


For those of you who are still feelling a bit uncertain. Here are detailed instructions.

1. Working from left to right, with needle pointing right to left, pull needle up at starting point.

2. Take a small stitch along line you want to embroider, going down on right, coming up on left.

3. Take another small stitch about 1/8 of an inch away from the one just worked.

4. Repeat step #3.

I snapped a few quick pictures this morning, but they don't really illustrate the stitch very well. Maybe I will take a few more.
I love the wrong side of vintage embroidery, all so neat and tidy. I have noticed that they never hop around, but always cut their thread and start again. So, I have tried to do the same. It makes for a lot of knots, but it is tidy!


And here are apples and grapes for you to try! If anyone is interested in the whole collection, feel free to email me, I love to share!

29 Mart 2011 Salı

Iron On Embroidery Transfers- The Modern Way

Iron On Embroidery Transfers- The Modern Way

Lately I have been into embroidery. I found some vintage iron-on embroidery transfers at the antique store. They are really cute fruit! (In case you didn't know, I LOVE fruit!)
The problem? How to get the design on the dish towels with out using the transfers. I only had one copy of each and I wanted to be able to use them as many times as I wanted. I knew I couldn't trace them very accurately. I tried buying sheets of iron-on transfer paper from the fabric store, that you put in your printer. What I didn't realize is it was for ironing on pictures or letters. What ever you don't cut off gets ironed onto the fabric in a sheet of plastic! Not what I was looking for.

I finally found the most simple solution! It is so easy too!


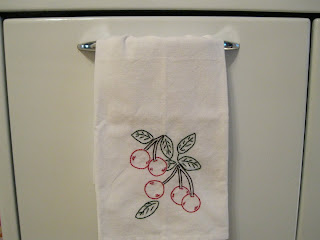
First, I scanned in all the transfers. Then I found a plastic report cover, trimmed it to the size of a page, put a piece of paper in it for support and printed the fruit on it. As soon as it came out of the printer I placed it faced down on my dish towel, laid a book over it (I found a soft cover book works best) and pressed firmly.

WHA-LA! Fruit on dish towel! Isn't that simple?!

And the great thing! The report cover is re-usable. Just wipe off with tissue and hand sanitizer.

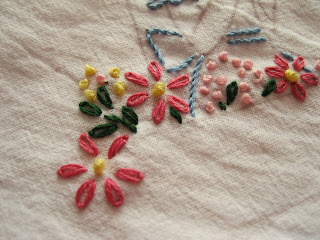
All ready to start embroidering my peaches and pears!


Strawberries, Apples, Plums and Grapes!
Tomorrow I will write about how to embroider and post a few transfers for you to use!!
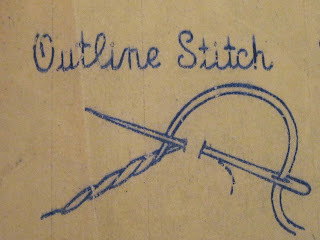