sewing etiketine sahip kayıtlar gösteriliyor. Tüm kayıtları göster

13 Nisan 2020 Pazartesi

Mask Tutorial- A Speedy Seamtress' Method

Mask Tutorial- A Speedy Seamtress' Method

 Like a lot of sewers/crafters Mandy and I have been making masks for our local hospitals and family/friends. We have been asked to make THIS mask. And while they have a nice video and directions posted, I thought the process could be made a little more intuitive and streamlined. This post is mainly for others who are sewing the same "Mask Alternative". But maybe you will glean a few tips for your mask sewing too!
(Pictures illustrating the steps are show below the written directions.) Speed Sewing
To speed up the sewing  process and not waste thread, sew quilter style by not cutting between ties. Once you have finished sewing the particular step you are on, lift your pressure foot and pull the tie or mask back about ½” -1” and place the next tie or mask under the foot, then keep sewing! (The length of the thread you will need to pull depends on what you are sewing. For ties, the thread between doesn’t even need to be as long as ½”. For the small darts on the mask you need more thread length between so you can maneuver better.)


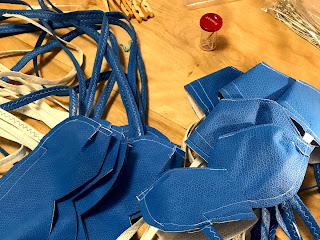
Step 1: Cutting Masks
Do not use pins. Instead trace around your mask pattern. When you cut the masks out, cut to the inside of the pen line. This way you will leave no pen mark on the finished mask.
 Place masks as close together as possible to maximize fabric. We averaged about 50 masks per 54” x 54” cloth or 30 masks and 30 ties per cloth.

While tracing the mask pattern, also mark the placement for the ties and place a dot where the channel for the nose wire starts and ends. (This dot will be about ¾” from the mask edge.)


Step 2: Cutting Ties
Cut ties 18” x 1”. (Because 54” is divisible by 18”!) A rotary cutter is very useful for this.We like to loosely tie 4 ties together for ease of counting. (Remember, ties are only one layer of fabric! You will need 2 blue and 2 white per mask.) Also cut lengths of yarn 36” long. (Twice the length of the ties as the yarn will be folded in half before sewing in.) Yarn can be a bit tricky to cut as it has so much stretch. We have found stretching slightly, but not too taunt is usually good. The yarn does get stretched a bit while sewing.


Step 3: Sewing Ties
Place a folded length of yarn in the center of a tie and fold tie over lengthwise. To make the process more streamlined we have found it helpful to clip one end of the tie and yarn folded together with a clothespin (any clipping device will also work, even paperclips!). Clip as many ties and yarn together as you have clothespins and then you are ready to sew!

We found sewing a zig-zag down the center of the tie made it go faster. The zig-zag catches the yarn securely and you don’t have to worry about sewing along an edge. Use a fairly large stitch width and length (A 4 for both length and width was perfect on our machine.)

To also speed up the process and not waste thread, sew quilter style by not cutting between ties. Once you have finished sewing a tie, lift your pressure foot and place the next tie under the foot, then keep sewing!


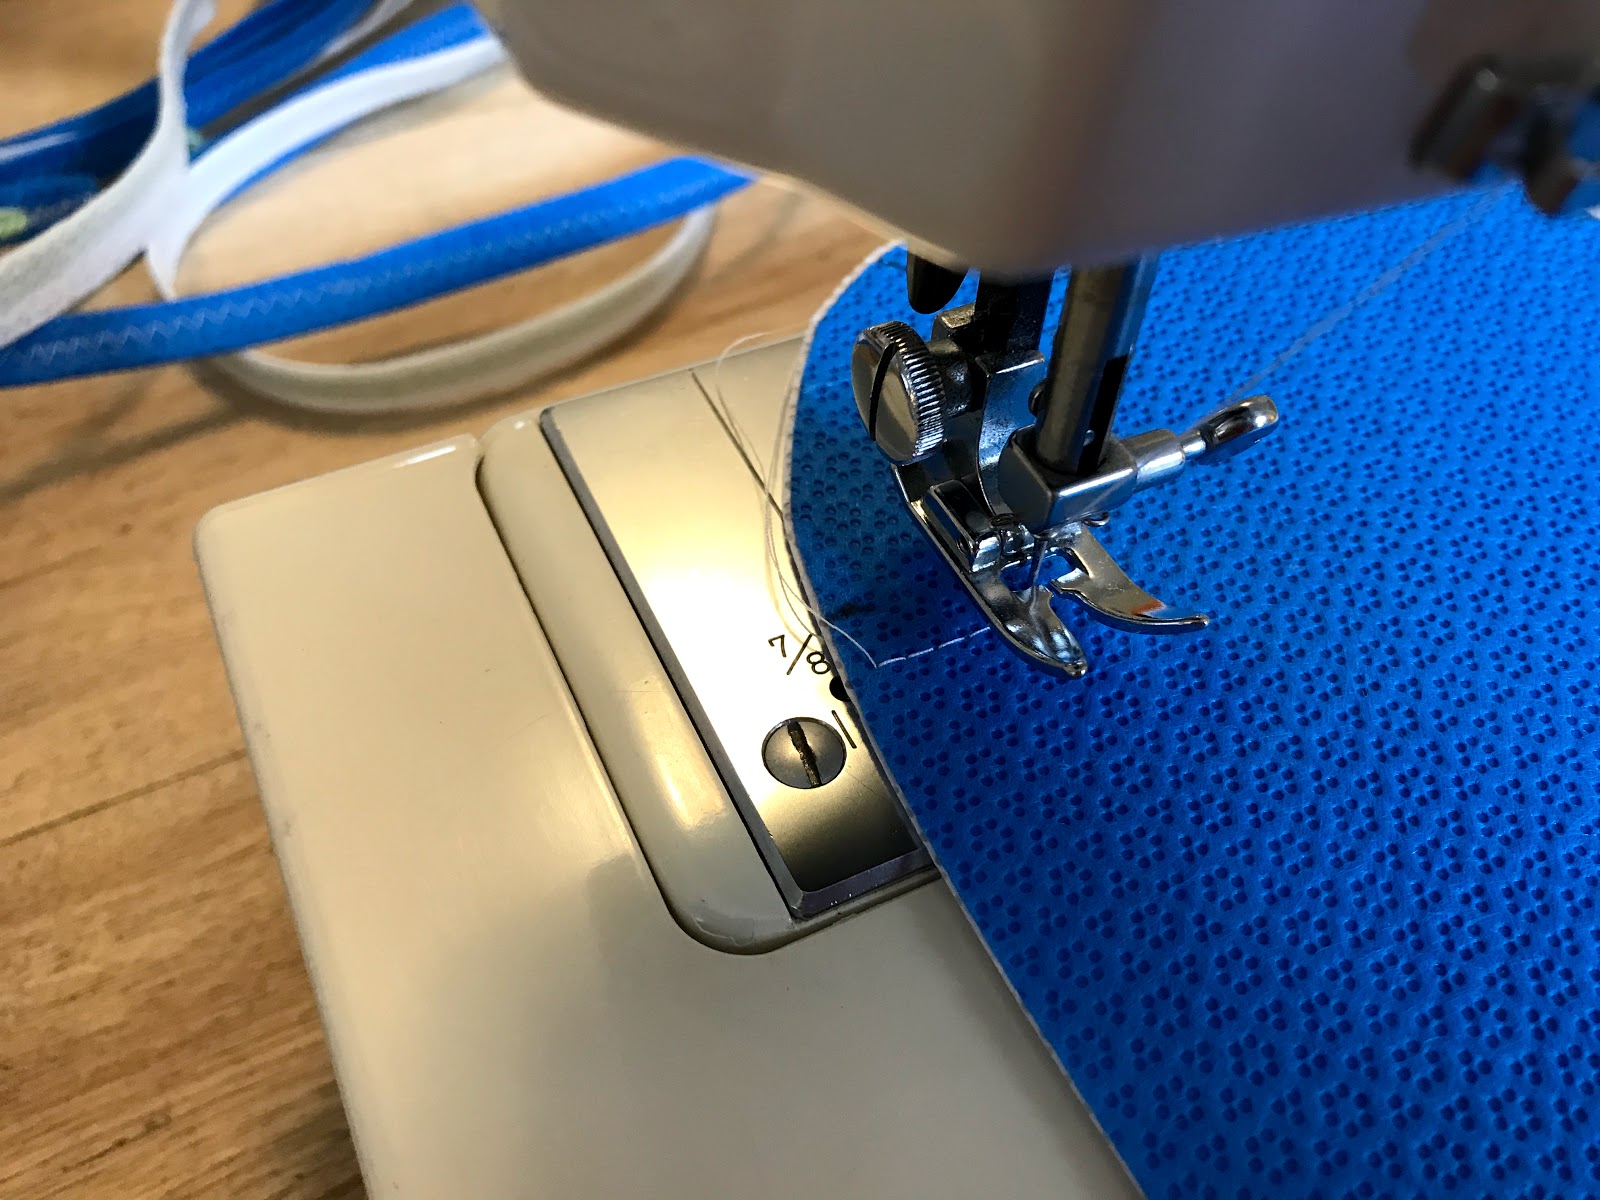
Step 4: Sewing the Wire Channel
The first step of the mask is sewing the wire channel (This just seemed to make more sense to me!) Place the mask under the pressure foot starting at the edge of the mask going into the middle. This should be about half an inch away from the tie mark. Sew a straight stitch from the edge to the dot.


Lift your foot and turn to sew down to the other dot.
Lift your foot again and sew toward the edge of the mask.   
 Finished channel.  


If you aren’t confident of sewing a semi straight line for the channel, place a piece of tape on your sewing machine 3/4” from your needle. Then use the edge of the tape as your guide.
You can speed sew the channels like you sewed the ties. Simply lift your presser foot when done sewing, pull the thread about an inch and start the next mask.

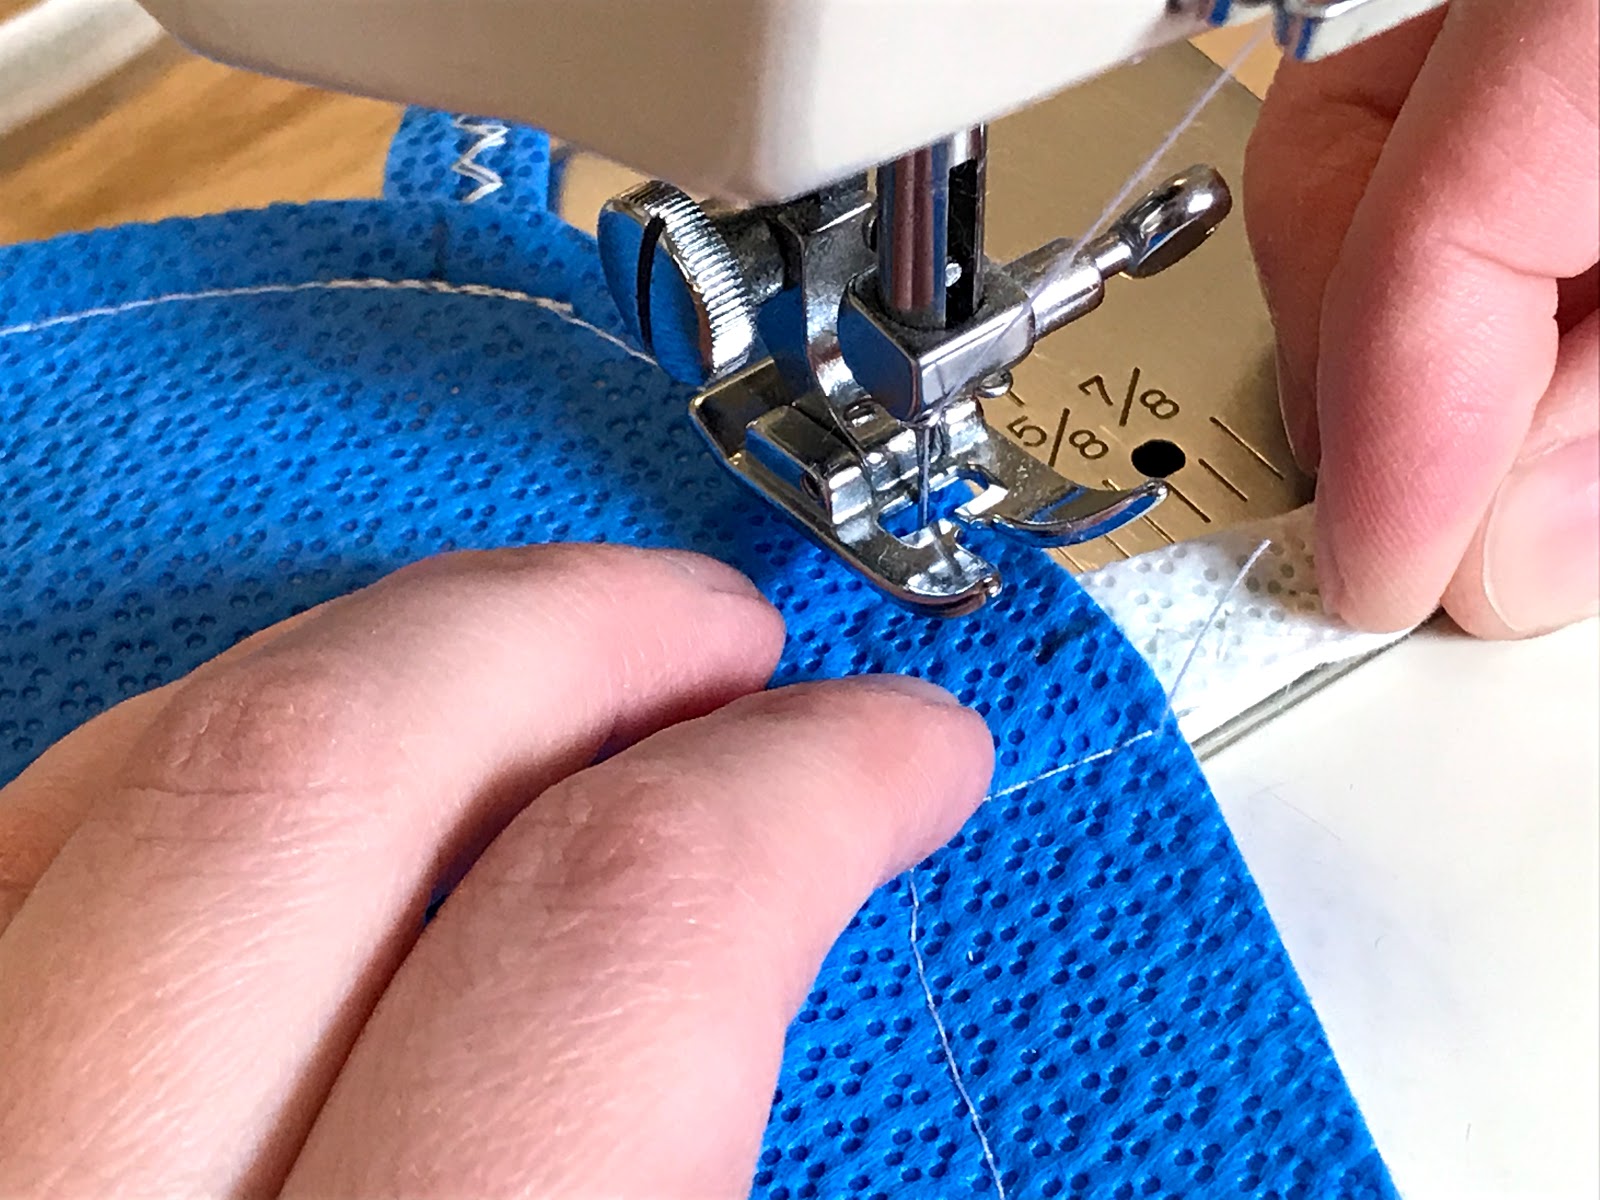
Step 5: Sewing the Small Darts
The small darts on either side should have been cut out when cutting the mask. Gently hold the edges of the dart together. Starting at the tip of the dart, sew down to the edge tapering out to ¼” at the edge. (The seam allowance is marked on the pattern to help you visualize.)

I don’t get too hung up on the shape or how far from the point I start. No one will notice if they aren’t even! I do try and start no more than ¼” from the tip. On my machine I try and start sewing with the edge of the foot opening on the tip of the dart.

Sew one dart per mask at a time so you can speed sew! (Just like you did the wire channels.) Though you will need to pull extra thread between the masks to maneuver.
Once the darts have been sewn, clip the threads and trim seam allowance to ⅛”. Repeat for the other side dart.


Step 6: Attaching Ties and Topstitching
In this step there is a lot going on, but the masks are almost done!
Start topstitching ¼” away from the edge of the mask at the bottom left hand corner, topstitching over the small dart (it doesn’t matter which direction the dart seam lays. I just try and sew it the same way on both sides.)

About an inch from the first tie placement mark, stop and place a tie between the fabric layers.

Continue topstitching until just over the tie, back stitch to the opposite edge of the tie and continue topstitching. You will have stitched over the tie three times.

Topstitch to about an inch from the next tie mark, insert tie between fabric layers, topstitch, backstitch and topstitch tie like the first.


You will now be at the wire channel, continue topstitching along the edge until about 2” from the end of the wire channel.
 

Make sure your needle is down, raise your presser foot and insert wire into channel. We have found the easiest way to get the wire in, is to push the wire into the channel as far as it will go, then hold the opposite end of the wire (that is already in the channel) and push it toward the edge of the mask. This swings the free end into the correct place.


Once the wire is situated, continue topstitching, sewing the ties in between the fabric layers and backstitching like you did previously until you reach the right hand corner of the mask. 


Step 7: Sewing Front Seam
You are now on the last step! Fold the mask in half matching the center fronts. You will  have to bend the nose wire to be able to do this.

Starting at one end, back stitch and then stitch the seam curving the seam line slightly as you go around the corner.  End the seam by back stitching.
 

Trim seam allowance to 1/8" and clip threads.


And you’re done!

And here is a printer friendly version of all the steps! No pictures included for faster printing.

Please let me know if you have any questions or would like a step clarified.
Happy Sewing! And stay healthy and safe!

6 Nisan 2017 Perşembe

Cozy Calico

Cozy Calico

Mom and I recently discovered the blog Posie Gets Cozy. (How have we missed her all these years?!?) We are so in love with her blog, her charming bungalow, cute as can be daughter and lovely quilts! Hours have been spent ohhing and ahhing. And before we knew it, inspiration was swirling around. So two weekends ago, the fabric was sorted, the sewing machine cleaned and threaded, the iron heated and a quilt was made.

Inspired by Alicia's calico comforter, we used an Ikea comforter instead of the usual cotton batting, tuffy floss ties instead of quilting stitches and simple 4.5" squares. From the fabric stash we pulled out all the reds, orange, blue, green, and browns (to match the living room) we could find.


Can you believe we had all these fabrics in the stash? Some had a copyright of 2000 stamped on the salvage...... It was so good to finally use them up!
The top went together fairly quickly. I was a little sad not to get it all finished by Sunday evening(couldn't wait to see how it would turn out!), but by Tuesday evening all the layers were sewn together and safety pinned. Though there are still tufts to be tied as we ran out of black embroidery floss.


 We are so happy with our new calico comforter, it has already become favorite. Kerri especially loves cuddling up in it. I love how nicely the colors go with the living room, even though to me it looks slightly reminiscent of the 1970s.


28 Mart 2017 Salı

Shirtmaking

Shirtmaking

One of my latest sewing projects has been classic button up shirts for myself. They have actually been on my list for awhile, especially in flannel and gingham. I am really excited how nice this one turned out and am anxious to make a couple more!

 The first one I made was a "wearable muslin" out of inexpensive quilting cotton that was in the stash.
(I am actually wearing this shirt today under a cardigan. Love how long it is, no drafts!)

I love the buttons! Since this was a use what I had shirt, I dug around in my button jar and found these cuties. They are quite heavy and might be ceramic/china?

 I think this is one of the coziest shirt I have made! It has already been worn several times and because it is such a light pattern I am planning on wearing it a few more times. Even though it took me two days to complete, it was worth it!

 There is a lot of steps in shirt making. Matching plaids (which I am not the best at), top stitching, collar and collar stand, cuffs and placket, back yoke. Just a lot of things going on! But nothing that isn't doable with a bit of patience and practice.

For those of you that sew, here are all the details.
Sewaholic Granville Shirt in size 6 (flannel shirt) and size 8 (calico shirt)
For my calico shirt I made a straight size 8 with no adjustment before hand. I did end up taking in the hips about an 1" each side.
For my flannel shirt I made the size 6, but did a 2" full bust adjustment, trimmed off 1/2" of the hip fullness and shortened the sleeves by 2".

I am rather proud of the inside of my shirt! All of the raw edges are enclosed by French seams or flat felled seams. Doesn't look like the inside does it?


23 Mart 2017 Perşembe

I had forgotten.......

I had forgotten.......

I had forgotten how much joy a finished garments brings, how sitting at a sewing machine with fabric feeds the soul, how ideas begin to sprout quicker then one can keep up while sewing, how good it is to fashion something with your own hands. I had forgotten how much I love sewing!
As much as I love knitting, sewing is really my passion. Working with fabric, letting my mind and fingers tuck and pin; brings the rest of life into perspective, and usually makes it look brighter! 
 I learned to sew when I was a wee girl, so it has been a part of my life for a long time. I still remember the fascination of watching Mom make my sisters and I dresses. Just about my eye level, I would stand for hours and watch the machine whirl away.

This is the York blouse from Seamwork. In a lovely Art Gallery Fabric, Ink Outburst in Atelier. The fabric was a birthday splurge!
This pattern gets quite a few bad reviews online, but I have made it work. I love the classic silhouette! My library of Seamwork patterns have really inspired my to sew plenty of pretty things that go with my everyday wardrobe. I haven't found the latest patterns much my style, but I love most from the first two years. And even if I don't like the patterns, the articles are always interesting!

The pattern originally had a slit in the back that closes with bias tape ties. I made a bias bound keyhole instead with a button.
I also altered the neckline a bit, too much of a boat for my small shoulders. The biggest problem most people had with the pattern was the low dart. I simply angled it upwards to create a French dart. I do have a bit of a problem with the armholes, but that might be because I went down a few sizes as there was a lot of wearing ease. I still ended up taking in the side seams and the center back.

I love all the extra details of this pattern! Can't wait for the weather to warm up a bit to wear it!

Has anyone else watched The Great British Sewing Bee? So inspiring watching all those amazing sewing projects!