You know how when you plan a big home renovation you know it is going to be totally worth it, but know before you get to the amazing finish there will be chaos, many decisions, hard work and furniture moving? And when you emerge, slightly frazzled and very much poorer, after the whole ordeal and say "Yes, it was worth!", but that was a LOT of hard work!! Whew! (It amazes me I always forget this! Lol!)
That is where I am right now. Recovery mode.
We absolutely love our hot water heat!! It is heavenly! My allergies are great! The upstairs is warmer than we anticipated!(One problem we were hoping to solve.) It really is a dream for an old un-insulated house. We cannot tell what the weather is like outside anymore. (Old house dwellers, you will know what I mean. The it-feels-slightly-more-drafty-then-usual-must-be-windy-outside. Or yep-temps-are-falling-the-corners-are-colder.) We feel insulated! It is so even, no warm or cold air drifting around the house.
To get to this heavenly warm bliss took four months, quite a few late nights and several long Saturdays. And we had a blast! Thank the Lord for family. My younger brother was as intrigued by the idea of retro-fitting hot water heat as I was!
It is hard to know where to even start! Two years ago I bought a house full of radiator, which had been waiting in the garage. We measured each radiator and figured the btu's, then spent several weeks discussing which radiator would work for which room and where to put it. We finally decided we needed two more small ones for the bedrooms, which we were able to find at a radiator salvage place in Duluth, MN.
This summer I worked on scraping and painting the radiators, which I posted about HERE and then Mandy and I removed all the old duct work, which you can read about
HERE. So glad we don't have to do that again! Yuck!
The next week we started plumbing in the supply lines and install radiators! This is the one in my room.
The project ended up falling into three phases: Phase #1- installing main supplies and returns, installing boiler, installing downstairs bedrooms and bathroom radiator, Phase #2- Switching dinning room radiator and moving living room radiator, Phase #3 piping in and installing upstairs radiator.
Lots of big pipes! We used 2" black iron for the supply and return lines. Then 1 1/2" and 1" pipes depending on the size of the radiator. Thankfully the brother had plenty of muscle to screw them all together! I stuck with organizing all the different sized fitting, handing tools and putting Teflon tape and pipe paste on fittings.
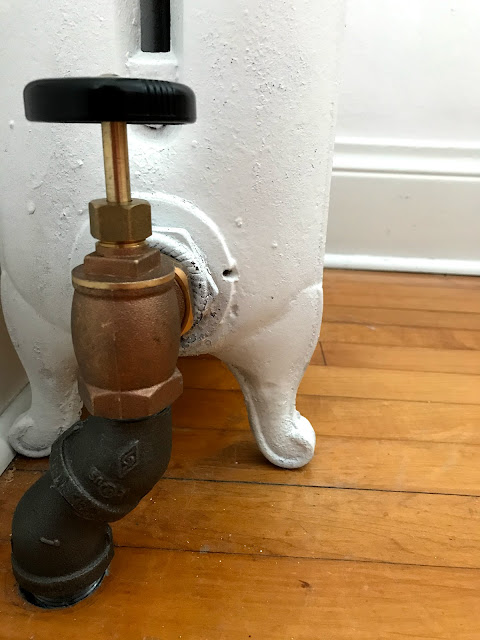
We installed the main supply and returns, the piping to both bedrooms and the bathroom. This is the bathroom radiator above. In floor radiant heat 1920's style! This style of radiator was made to fit perfectly between floor joints or you could hang it on the wall. They knew how to make the most of small spaces back then! The kitchen radiator was also pipped and installed. We couldn't install the dining room radiator or the living room as we had to do a little shifting around, which I will explain later. For the radiator upstairs in Mandy's room we added tees and valves and figured out where the pipes would run, but her radiator was phase #3! So that comes later!
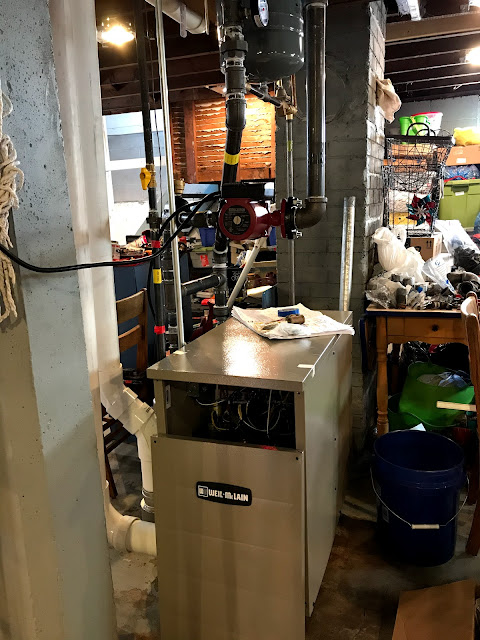
Finally the day before Thanksgiving the boiler arrived! It took a few weeks before it was up and running, but as soon as we could we connected it to the kitchen, bedrooms and bathroom radiator and fired it up! At this point we had part of the house running off the boiler and the living and dining room running off the hot water heater. But not for long!
We made sure to put plenty of gauges in! I love running down and checking the pressure and temperatures. This also helps us know if the system is running correctly and efficiently. Because we used old radiators we have also ready had a couple of issues with clogs in the system. (We think a mouse was eyeing up a radiator for a winter nest! Lots of debris floating around the system. Thankfully we have a strainer before water goes back into the boiler.)
Whew! That was the end of Phase #1! Just in time for a cold snap!
On to Phase #2 which required a couple of strong guys to move the radiator currently under the living room window upstairs! We were all a little apprehensive, but guys were pros and it was up the stairs and in it's new home in seven minutes. Then they moved a slightly larger radiator from the garage into the living, but hold on... Is that a hole in the floor?!?
It just so happened that there was an old cold air return right where the legs of the radiator was going to sit! I was prepared and had some salvaged oak flooring (from the elder brother) handy to patch it up.
Can you believe that is the hole? I can't take credit for this one, the brother did most of the work. But I have two more to do, so hopefully I can post a couple of tips. It really helps to have old wood floor boards that match your floor color! I was really surprised how well they matched. I think it helps that the floors and the patched boards all have shellac on them!
Before those radiator hauling guys left, we also had them move this giant radiator from the corner of the kitchen/dining room/hallway to the other side of the kitchen doorway. We had originally put it next to the hallway because we knew it would help heat the bedrooms and because there was an old heat vent we could run the temporary pex piping down. Moving it heats the dining room more evenly and prevents the bedrooms from getting over heated now that they have their own radiators.
The radiator placement was the most discussed. Should it be centered on the wall? Should we leave it next to the doorway? We finally decided to put it in the corner which would leave enough room for a piece of furniture next too it.
As you can see, we ended up moving almost all the furniture in the dining room and living around! I will post about that later.
That was also the finish of Phase #2.
On to Phase #3! Once the radiator was upstairs we just had to get pipes up. After the a lot of figuring and measuring we decided the best way was to run the pipes up along the corner of the entry next to the coat hooks. We would leave these pipes exposed as we knew that was not 4" thick, it was only 2". (Once I paint the pipes, they will look like they have been there a hundred years!)
But the only way to get across the room was to run the pipes inside the floor, so we had to cut a hole in the entry ceiling. Nothing I can't fix, but it is always sad (and messy!) cutting into plaster! This was the last phase of the project and we were so ready to get it done! Maybe this project has more than three phases? Phase #4 is cleaning up. Can't wait for spring to give the basement a good clean out! It is disastrous! In the mean time, I can work on plaster and floor patching and trim patching....
In case you are curious, here is a break down in costs. It is such a different project, we didn't really have a good idea what it was all going to cost.
1100 sq. ft house with 8 radiators
9 radiators from Craig's list - $400
2 radiators from Northland Radiator in Duluth, MN - $300
boiler - $3000
pipes, fititngs, valves - $3000
Total - $6700
I love these radiators! And I am so grateful my brother was willing to tackle this project with me! At times it was a family project as occasionally the only way he could find available time was to bring the kids along. It made for a fun family circus! And I hope we have instilled a little renovation love into the next generation!
Let me know if you have any questions friends, I would love to talk more about my hot water heat!


